10 years, 11 months ago
This post shows you (and me when I forget in a couple of months!) how to set up a basic toolchain for spatial queries on Ubuntu 12.04. After installing PostgreSQL and PostGIS, we'll load data from a shapefile, try some queries, and display the spatial database layer in QGIS
Step 1: Install PostGIS
Install the packages you’ll need
sudo apt-get install postgresql-9.1-postgis postgresql-contrib-9.1 pgadmin3
Become postgres user
sudo -u postgres
Create a separate database user for your spatial databases
createuser -SdR gisuser
Create your database
createdb -E UTF8 -O gisuser dbname
Load the pl/pg procedural language (the postgis functions are written using this)
createlang plpgsql dbname
Load the postgis spatial functions
psql -d dbname -f /usr/share/postgresql/9.1/contrib/postgis-1.5/postgis.sql
Load the spatial reference systems table
psql -d dbname -f /usr/share/postgresql/9.1/contrib/postgis-1.5/spatial_ref_sys.sql
Change table ownership
psql dbname -c "ALTER TABLE geometry_columns OWNER TO gisuser"
psql dbname -c "ALTER TABLE spatial_ref_sys OWNER TO gisuser"
Change the postgres user’s database password so you can use it to log in with pgadmin3, and the gisuser’s password so you know what it is
psql dbname
ALTER USER postgres WITH PASSWORD 'newpassword';
ALTER USER gisuser WITH PASSWORD 'gispassword';/q
Log out of postgres user session
exit
Step 2: Look at your new database in pgadmin3
Load up pgadmin3. click the plug icon to create a new connection.
- name: localhost
- server: localhost
- user: postgres
- password: the database password you set for the postgres user
If it connects successfully, expand server groups > servers > localhost > databases, and click the name of your database (if you can’t expand something, click once to connect, then try again). you’ll see the objects that make up your database. to see tables, expand schemas > public > tables. if you click on a table, you’ll see the SQL create statement that made it in the pane in the lower right corner of the window.
You should see two tables: spatial_ref_sys and geometry_columns
Step 3: Try a query in pqadmin3
Click the SQL magnifying glass icon in the pgadmin3 toolbar
Try the following:
SELECT srtext FROM spatial_ref_sys WHERE srid = 4269;
Run the query using the green pay button in this window’s toolbar. you should see information about this projection.
Step 4: Load the zipcodes shapefile into the database
Download a file of california zipcodes from http://www.census.gov/geo/cob/bdy/zt/z500shp/zt06_d00_shp.zip
sudo cp Downloads/zt06_d00_shp.zip /var/lib/postgresql/
sudo chmod 777 /var/lib/postgresql/zt06_d00_shp.zip
sudo su - postgresunzip zt06_d00_shp.zip
shp2pgsql -c -D -s 4269 -I zt06_d00.shp public.zipcodes > zips.sql
psql -d dbname -f zips.sql
psql dbname -c "ALTER TABLE zipcodes OWNER TO gisuser"
exit
Step 5: Look at the zipcodes spatial table in QGIS
sudo apt-add-repository ppa:ubuntugis/ubuntugis-unstable
sudo apt-get update
sudo apt-get install qgis
Start qgis from terminal or gui menu
In top menu, click layer > add postgis layer
- name: dbname
- service:
- host: localhost
- database: dbname
- user: gisuser
- password: gispassword
Click test connection - if it works, check the boxes to save username and password then click ok.
Click connect to connect to the connection you just set up. select the zipcodes table and click add.
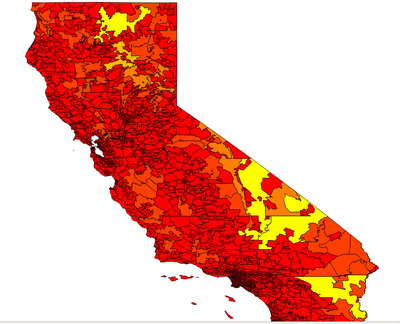
Zipcode polygons appear!
Recent Posts
- Heartbeat Choker
- 2014 elections party results maps
- Voter Turnout in the 2014 South African Elections
- Open Access to ICTD Research
- Let them eat cellphones?
Archive
2015
- October (1)
2014
- May (2)
2013
Categories
- arduino (2)
- beforeiforget (4)
- digital methods (1)
- dissertation (1)
- django (2)
- gis (4)
- internet activism (1)
- mobiles and development (1)
- networkanalysis (1)
- R (2)
- research (1)
- sewing (1)
- ubuntu (2)
Comments
New Comment